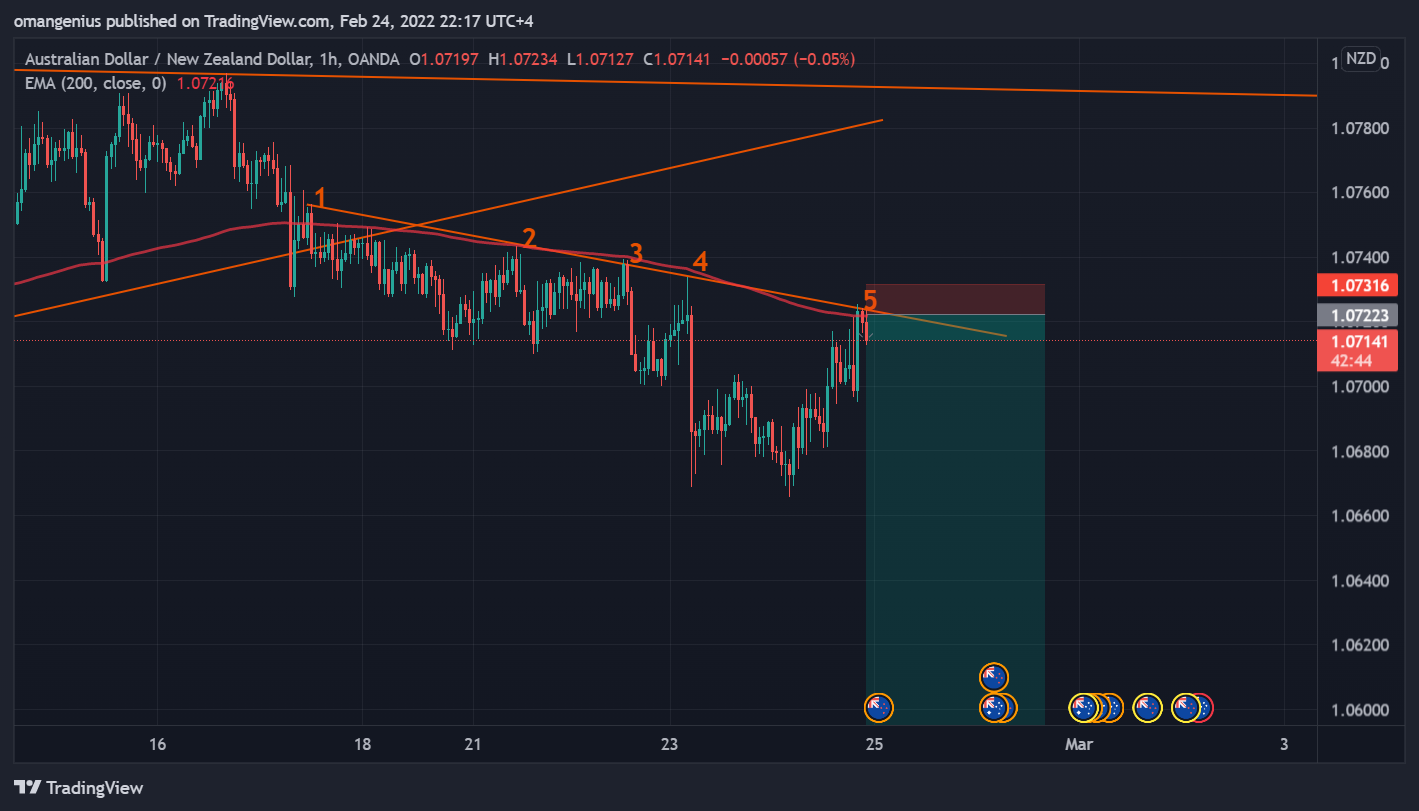
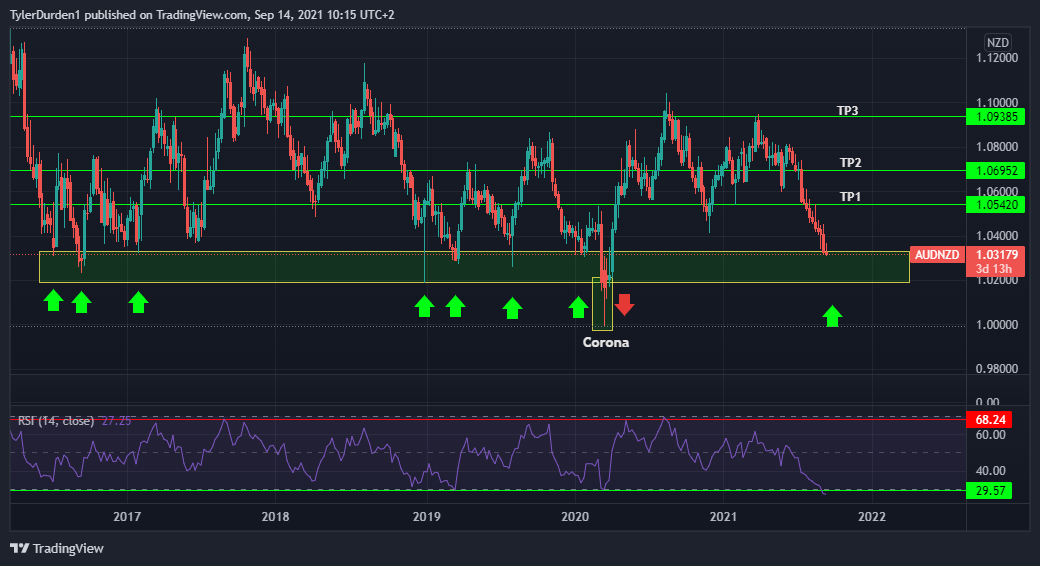
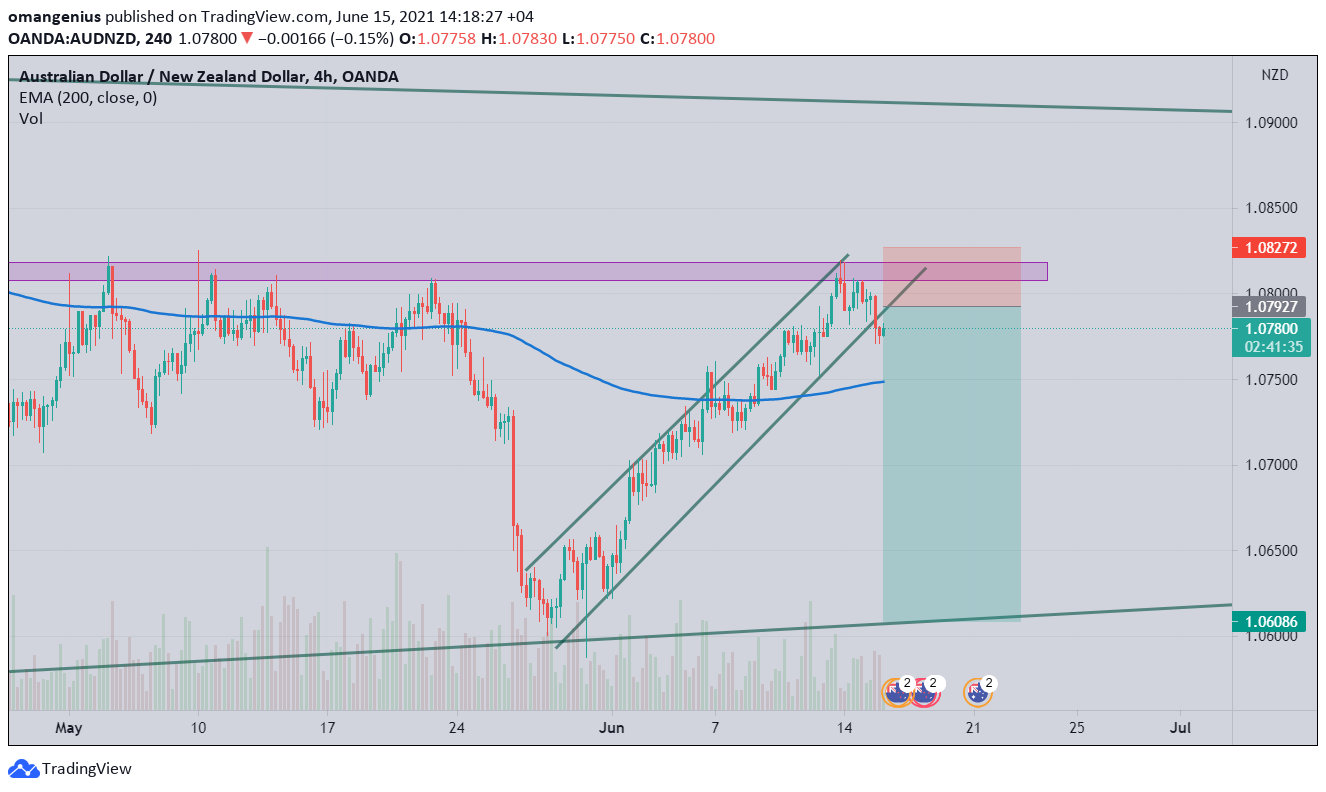
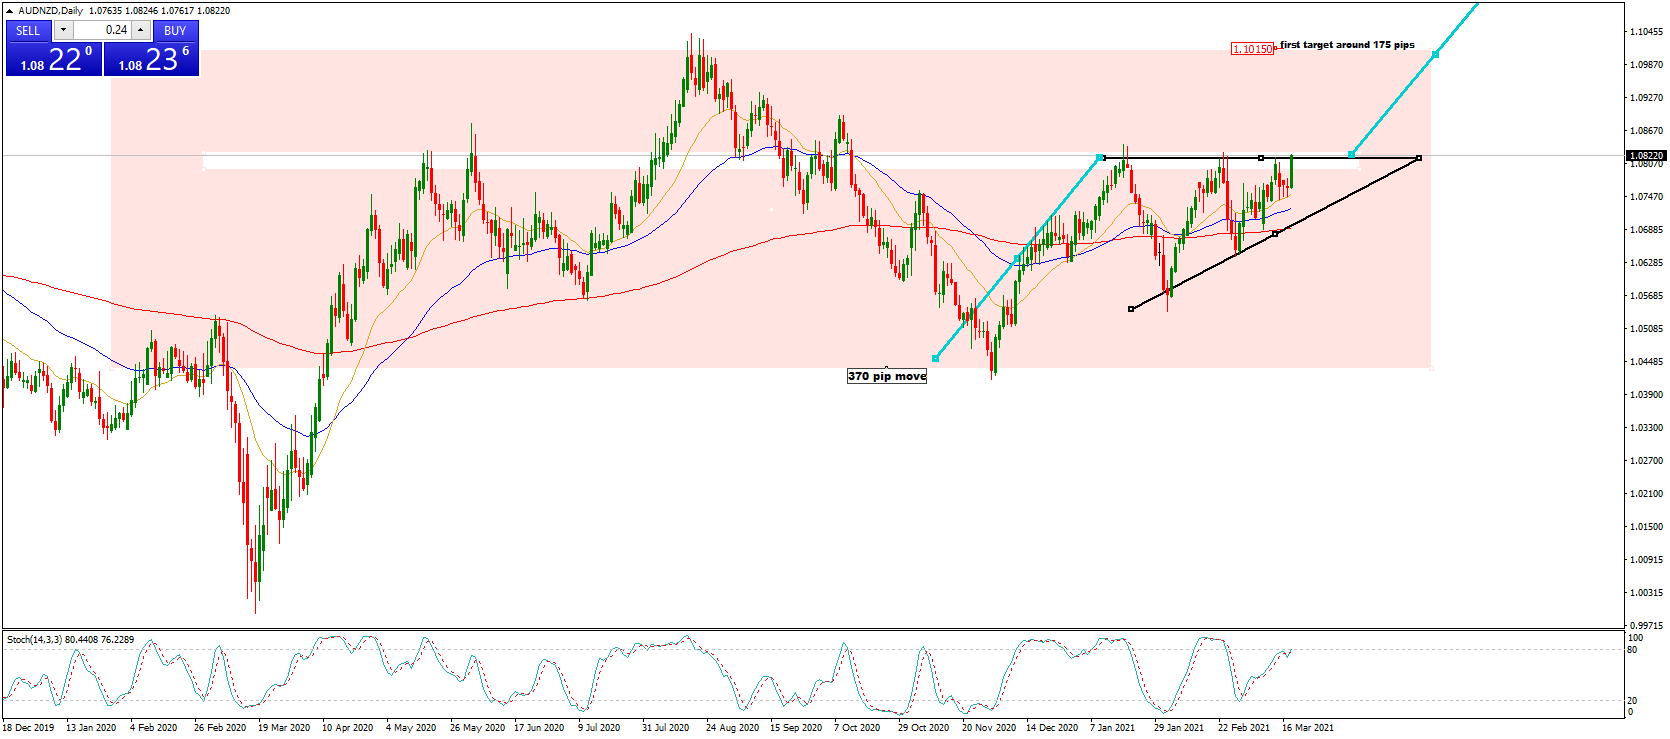
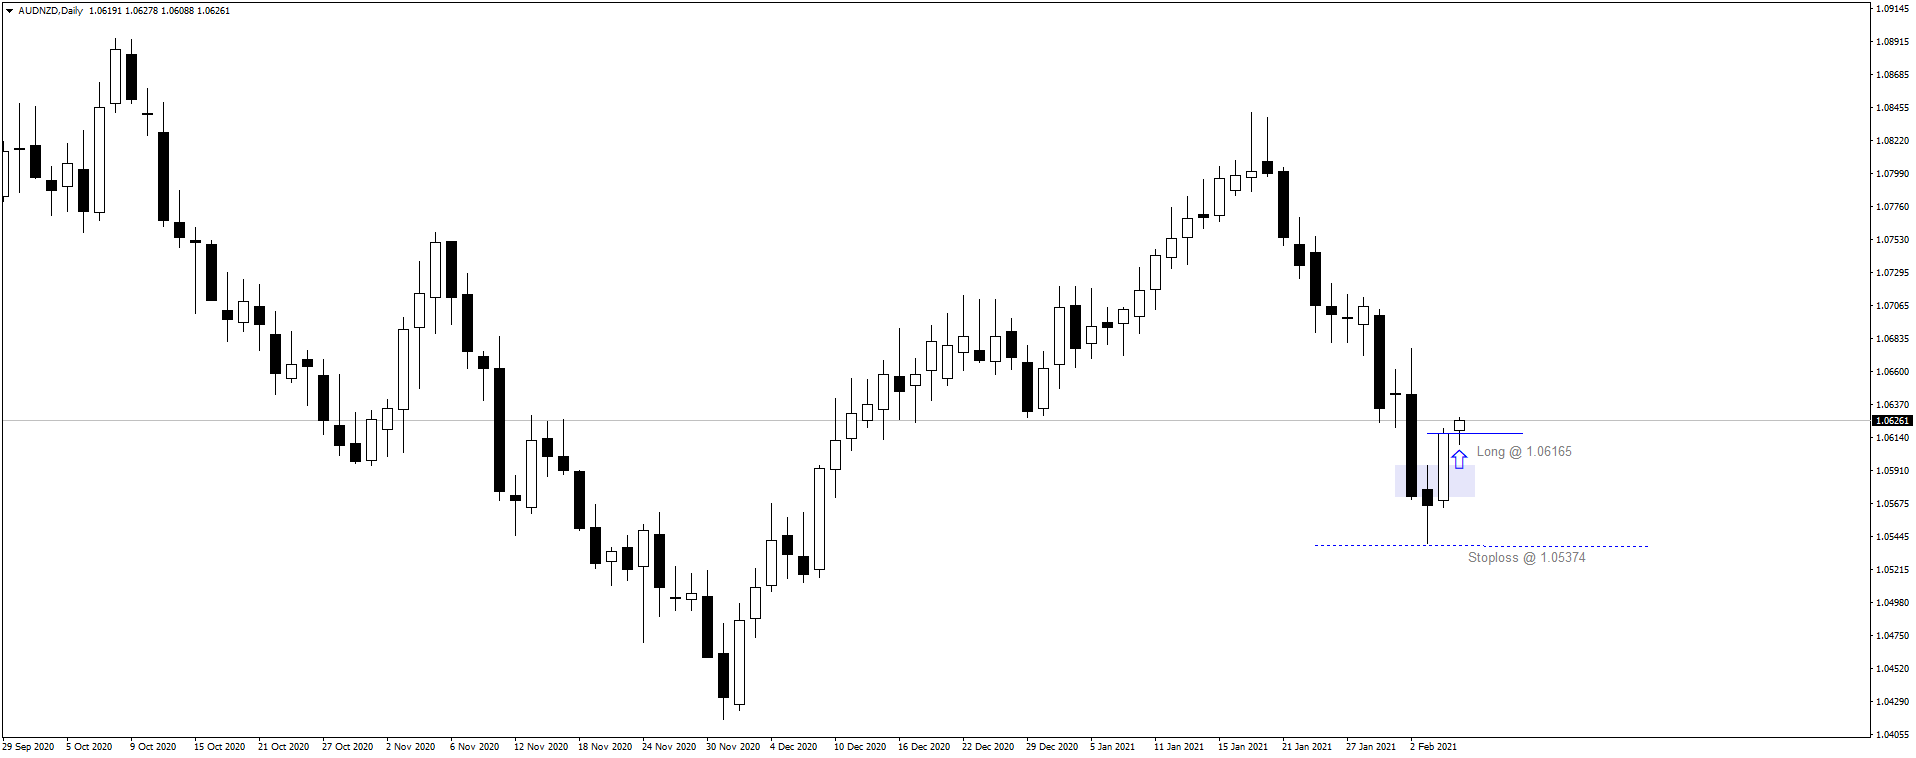
Forex Blog |  AUD/NZD

AUDNZD breakout

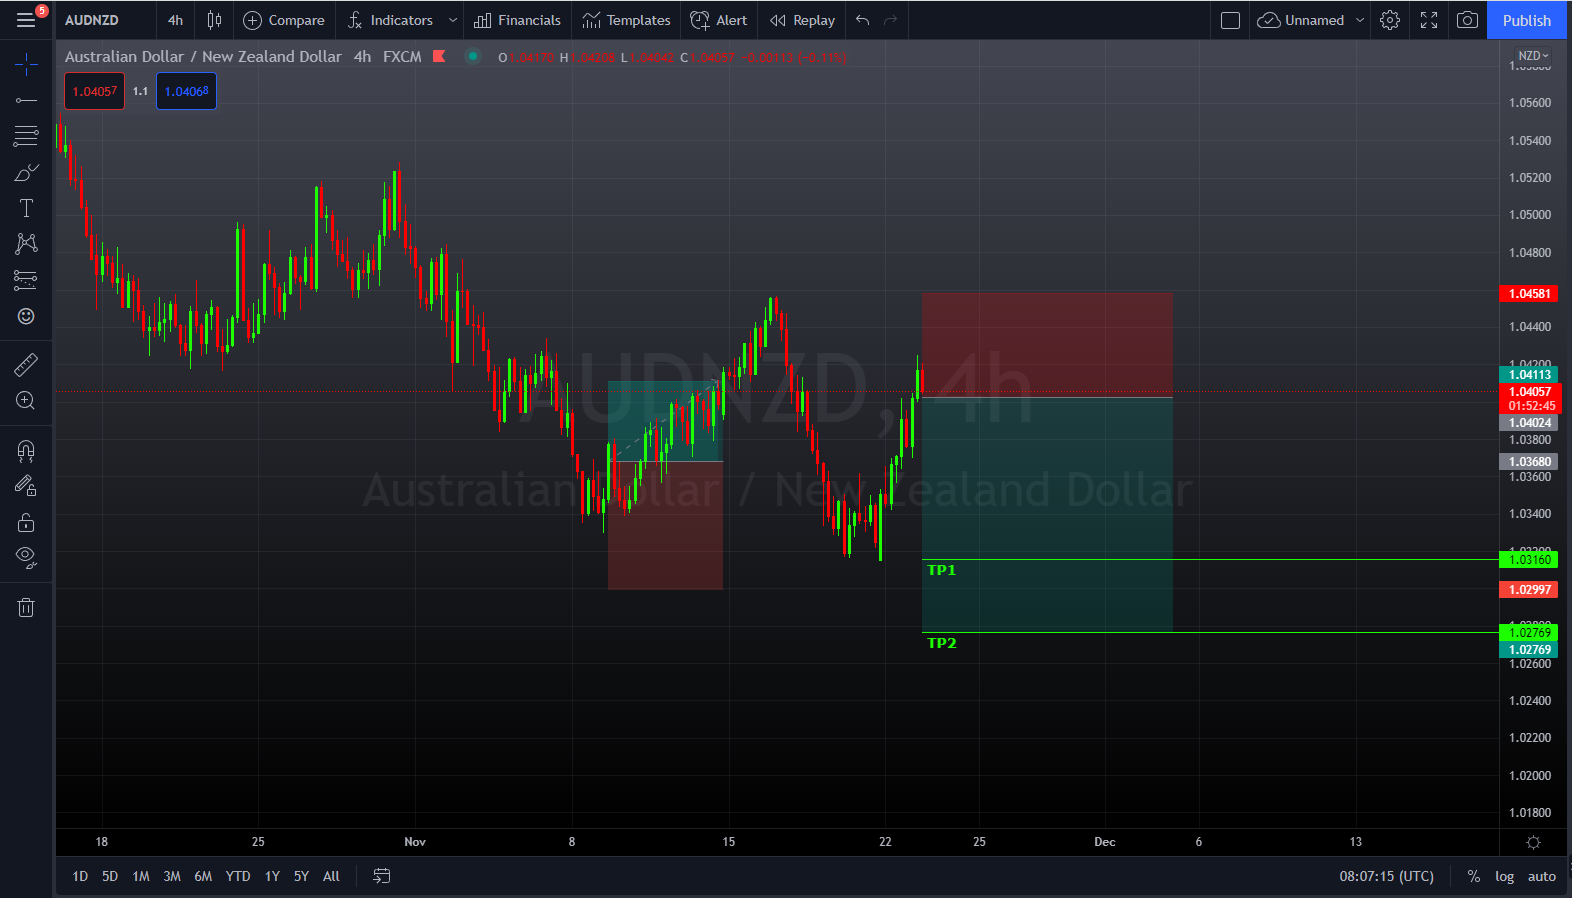
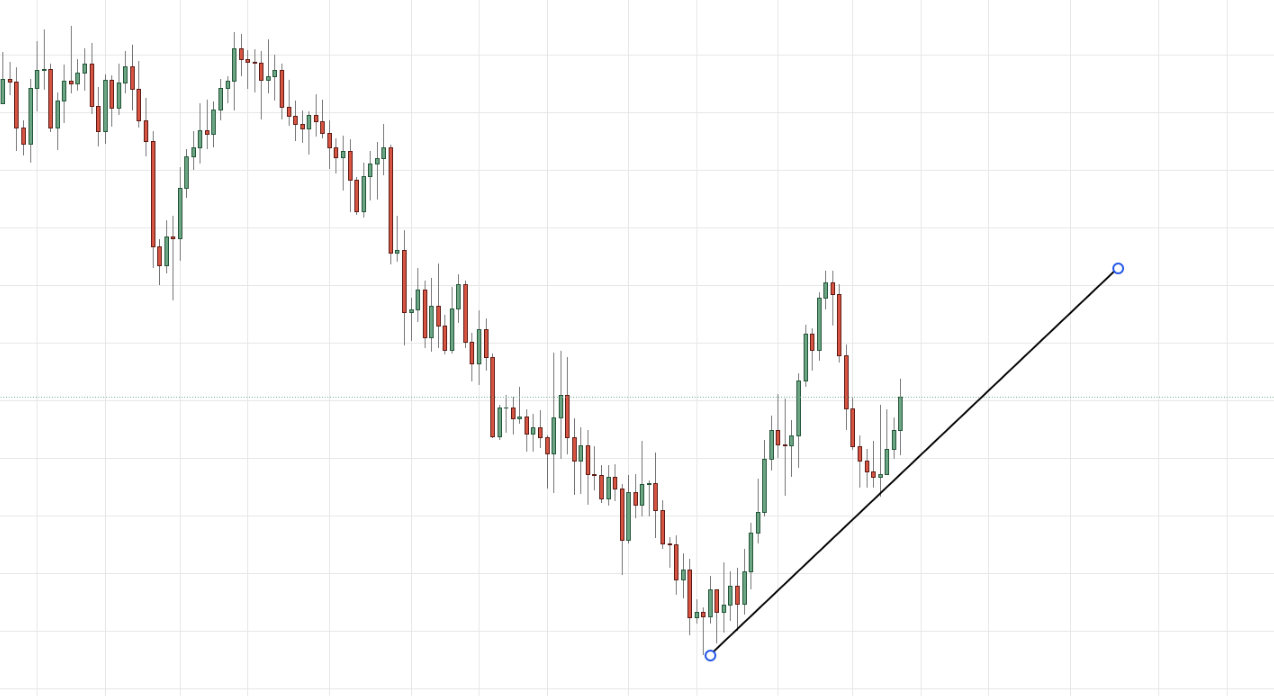
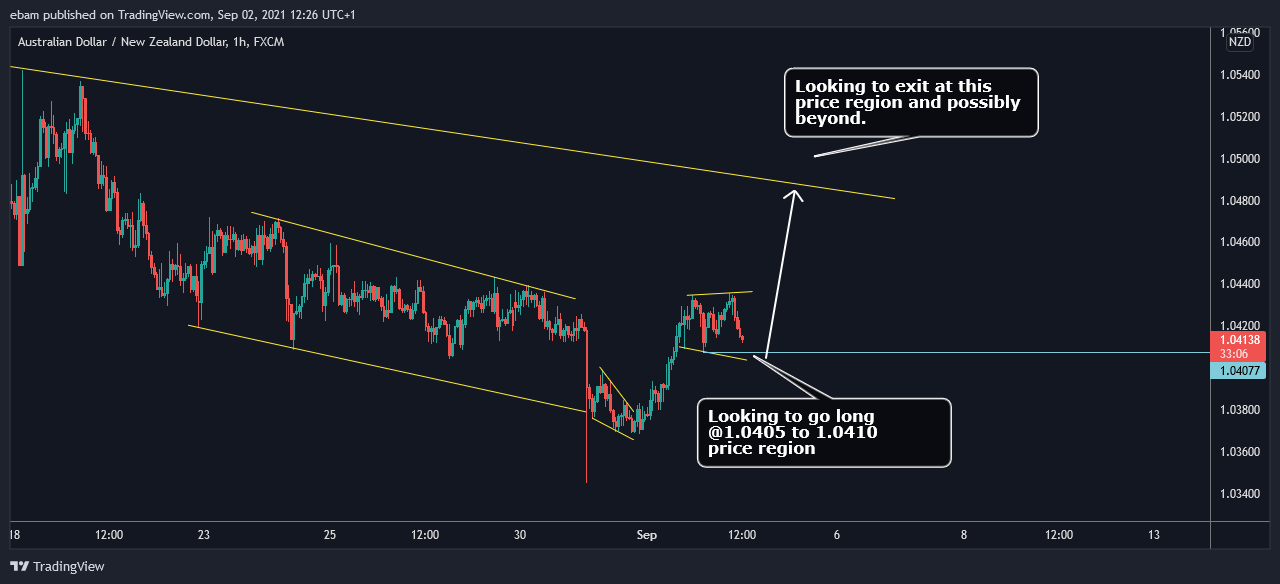
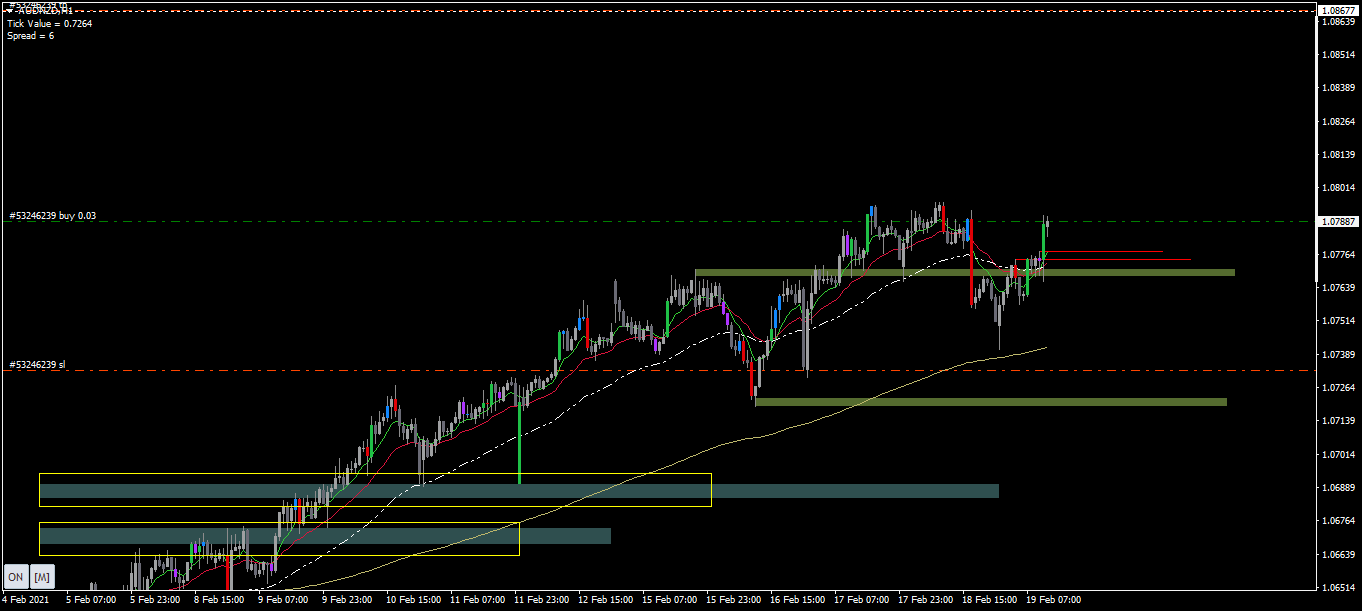
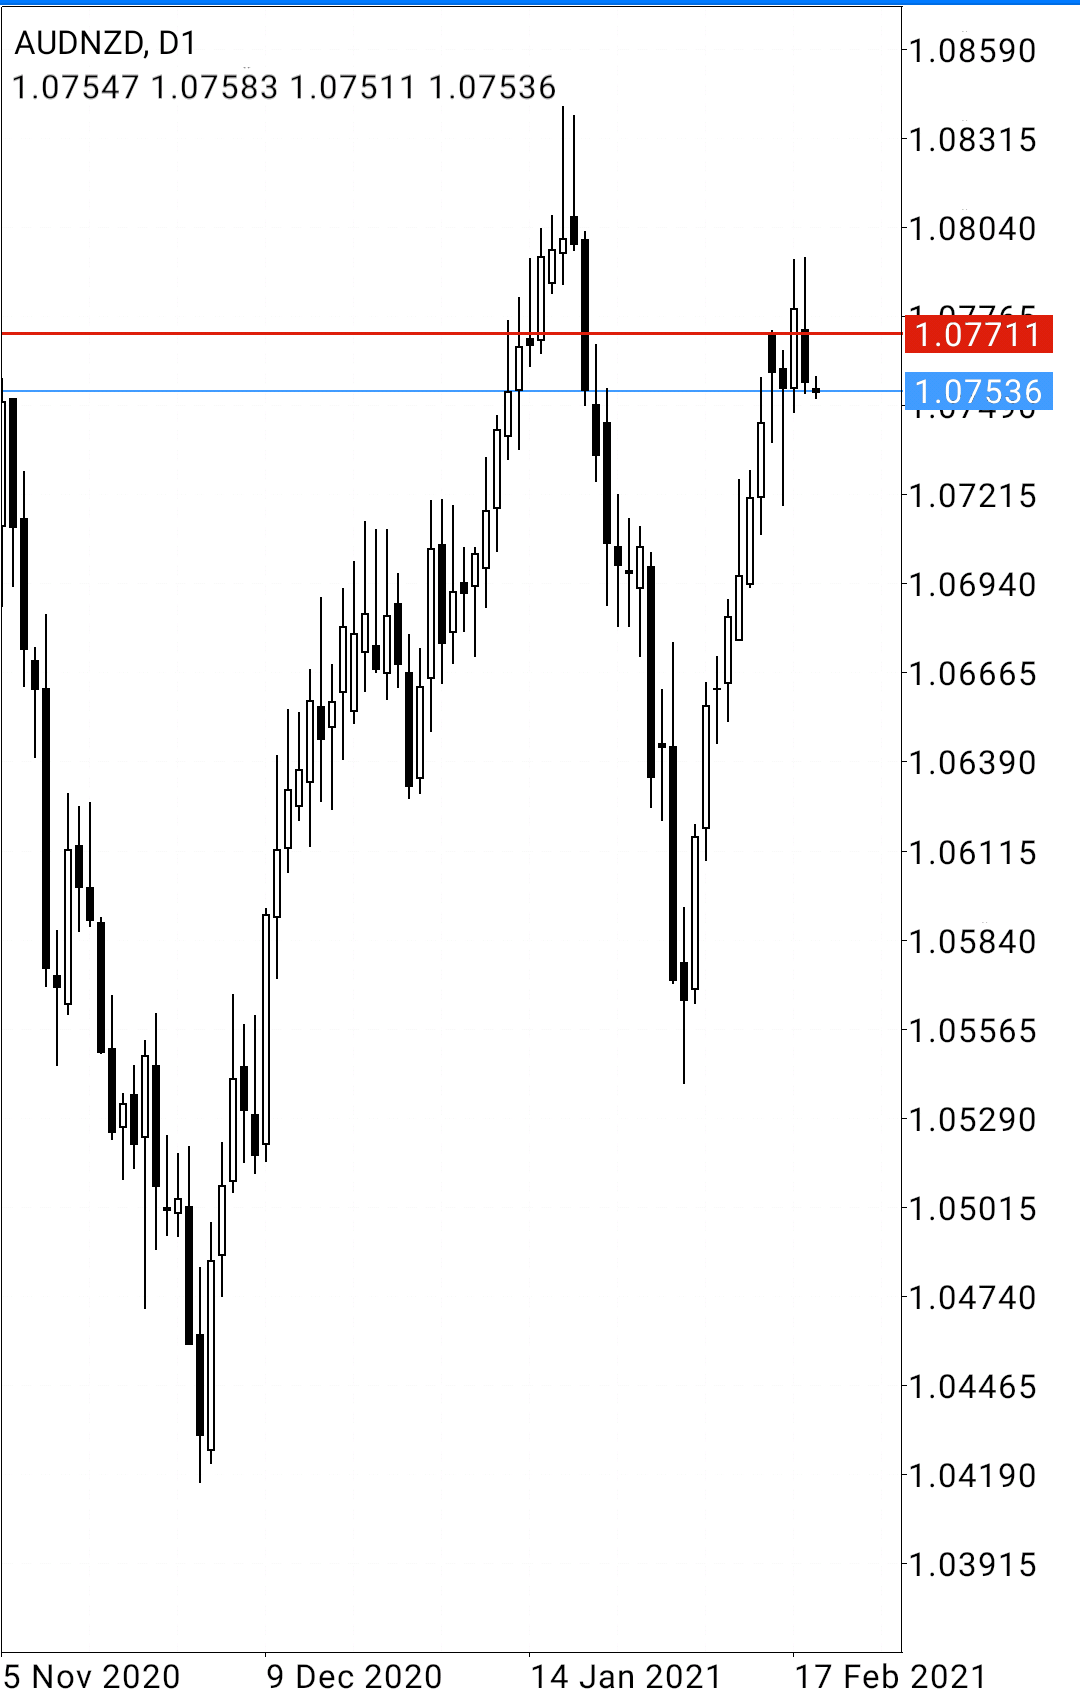
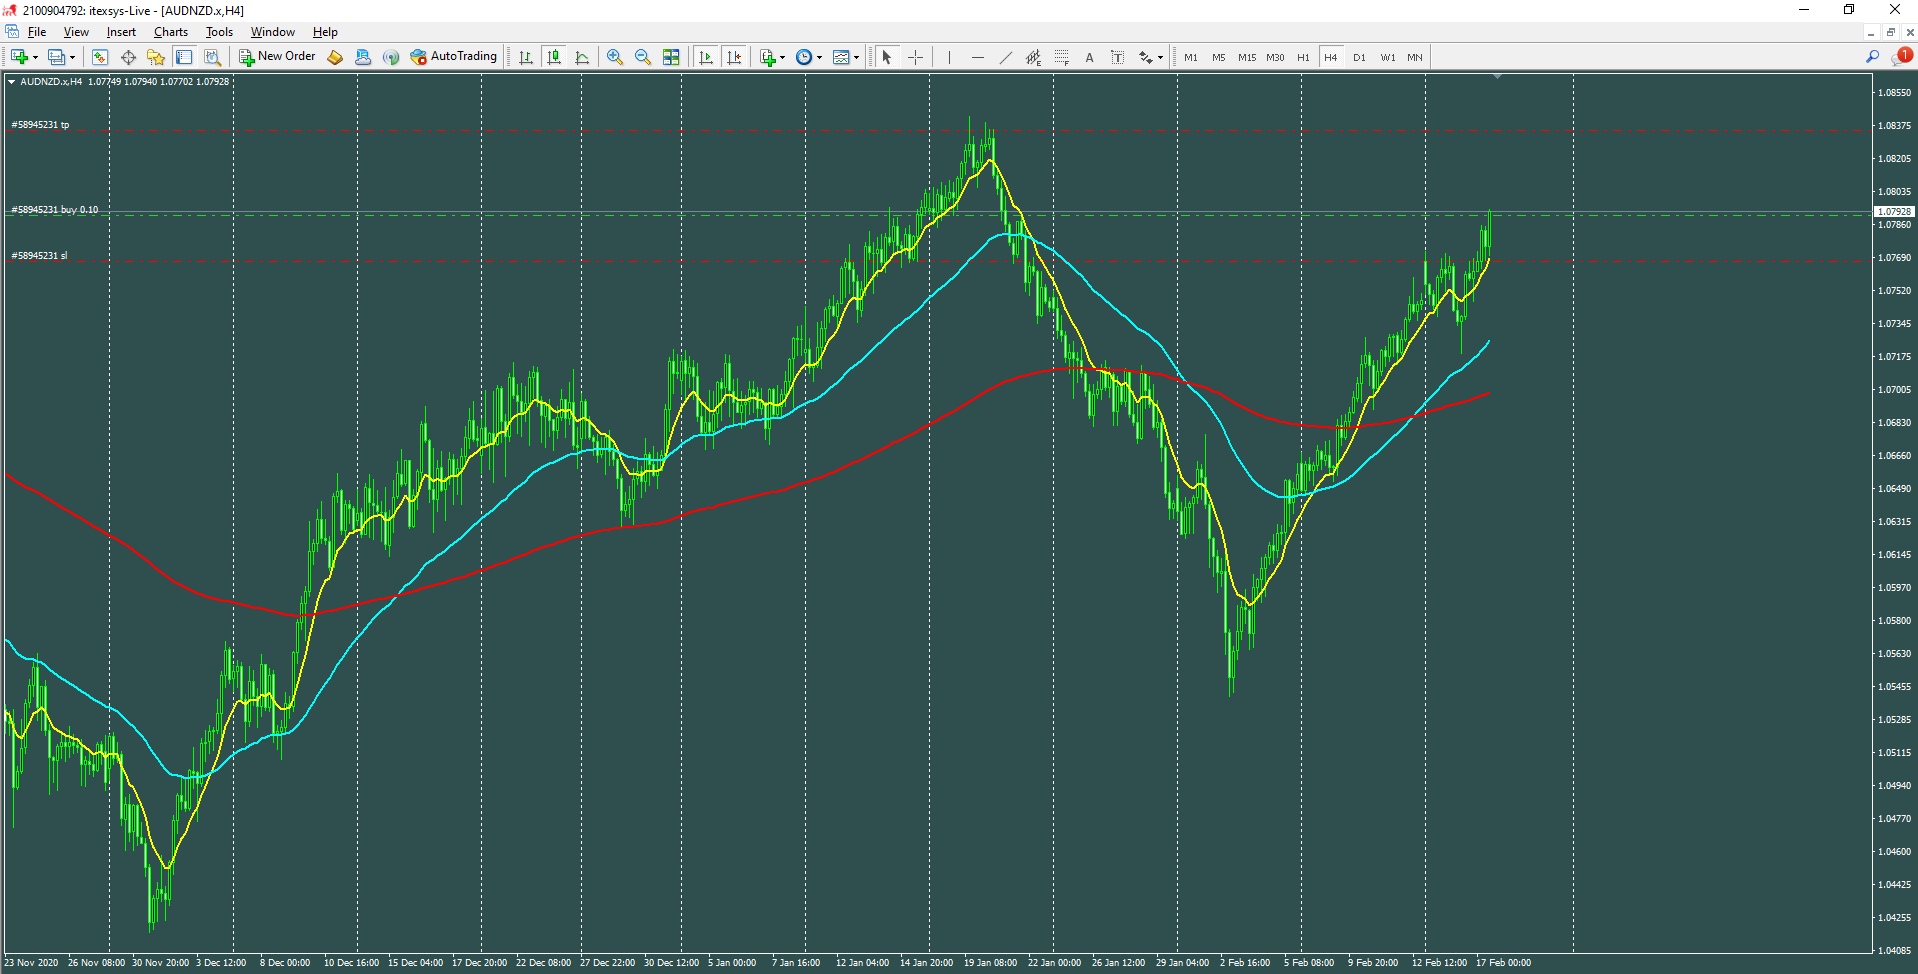
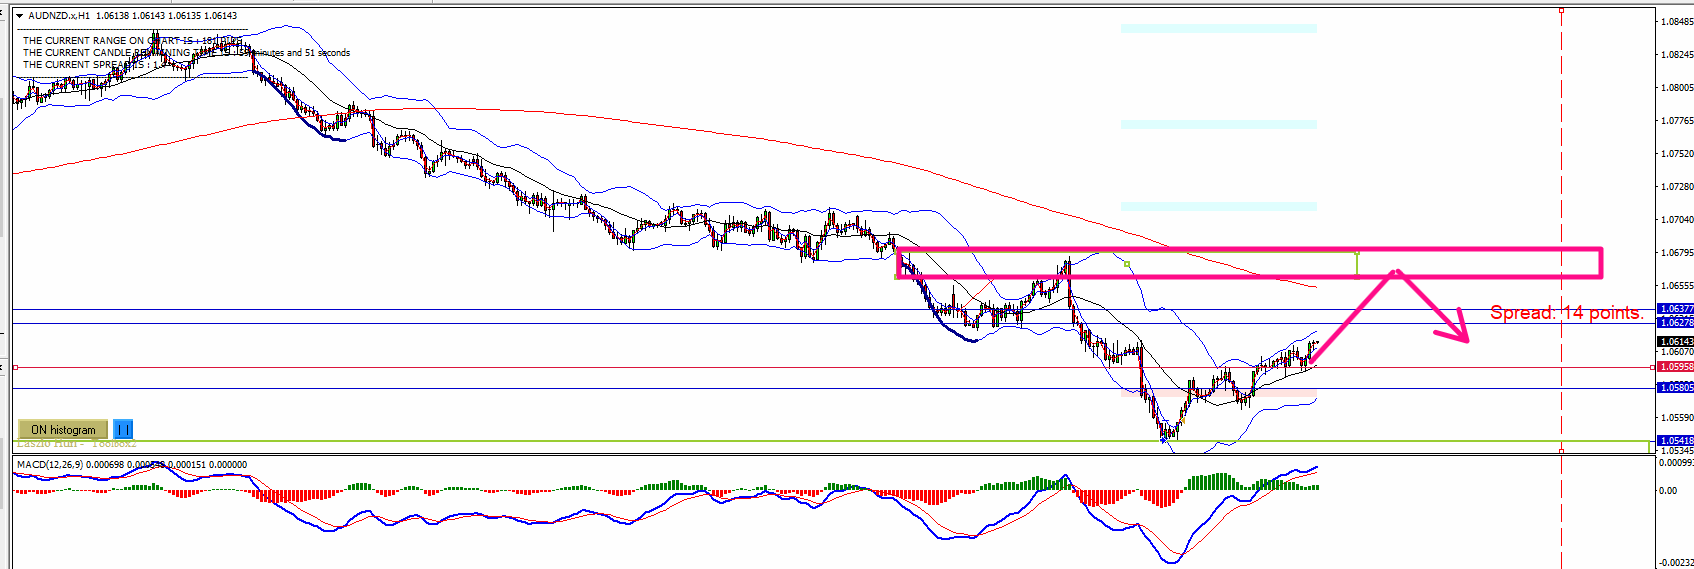
AUD/NZD | Long | H4 Timeframe: H4 Analysis Method: vol/wav Analysis: The price is ranging closely, looking for a breakout. Wait for absorption volume and retest of the broken zone to enter long. Trade Plan: buy on breakout Risk Management: 1% Things To Watch For:

Read More »
AUD/NZD W1 Elliott Wave

AUDNZD Short

AUD/NZD | Short | W1 Timeframe: W1 Analysis Method: Elliott Wave Analysis: The analysis shown here is the daily count. A 5-wave impulse appears complete and based on my weekly count a major top may be in place for this pair. Trade Plan: Stop at

Read More »
AUD/NZD D1 Price action and 200 EMA

AUDNZD Short

AUD/NZD | Short | D1 Timeframe: D1 Analysis Method: Price action and 200 EMA Analysis: Pin bar rejection off 200 ema. Potential continuation of downtrend. Trade Plan: SL= 1.06351 (90 pips) TP= 1.03651 (180 pips) Trailing stop of 60 pips as per ATR. Risk Management:

Read More »
AUD/NZD W1 Support

AUD/NZD Swing

AUD/NZD | Long | W1 Timeframe: W1 Analysis Method: Support Analysis: In AUD/NZD you can see multiple recections from the Zone in a Weekly time frame. Wait for clear rejection, it probably pushing 4H deeper in the Zone and after should be buyers back. Trade

Read More »
AUD/NZD H1 Chart pattern

AUDNZD LONG

AUD/NZD | Long | H1 Timeframe: H1 Analysis Method: Chart pattern Analysis: I am looking to go long on the price region marked out on the chart if price permits me, else I’m fine staying out. Risk Management: Risk not more than 0.4% of one’s

Read More »
AUD/NZD H1 Chart patterns

AUDNZD SHORT

AUD/NZD | Short | H1 Timeframe: H1 Analysis Method: Chart patterns Analysis: I am going short at the price area marked on the chart. However, price is king and I’m keen to see how this develops. Risk Management: Risk not more than 0.4% of overall

Read More »
AUD/NZD H1 RENKO + ICHIMOKU

AUDNZD – SHORT

AUD/NZD | Short | H1 Timeframe: H1 Analysis Method: RENKO + ICHIMOKU Analysis: Still in a bearish trend at the moment. We created a renko triangle and broke it. I tried to enter short at the level displayed on the picture. Target 2 times risk

Read More »
AUD/NZD H4 We Trade Waves

AUDNZD is preparing for a rally up on bigger TF

AUD/NZD | Long | H4 Timeframe: H4 Analysis Method: We Trade Waves Analysis: The previous top should be broken If running flat was made before. Trade Plan: Follow your plan Risk Management: 0.7% Things To Watch For: Not to panic and close trade until it

Read More »
AUD/NZD D1 Elliott Wave

AUDNZD Short Elliott Wave Technical Analysis

AUD/NZD | Short | D1 Timeframe: D1 Analysis Method: Elliott Wave Analysis: See below Trade Plan: I sold the pair based on the wave pattern. Entry was at 1.0731 which lined up with the confluence of daily resistance, the extension of the lower triangle trendline

Read More »
AUD/NZD H4 PA

Immediate short AUDNZD

AUD/NZD | Short | H4 Timeframe: H4 Analysis Method: PA Analysis: Short on Resistance area Trade Plan: S1 -Short with black line scenario s2 -High probable scenario with last 2 days being bullish, so beware(red line) Risk Management: S1 1:3 Things To Watch For: Any

Read More »
AUD/NZD H4 Technical / Supply & Demand

Sell Opportunity

AUD/NZD | Short | H4 Timeframe: H4 Analysis Method: Technical / Supply & Demand Analysis: Daily: Daily uptrend line has been broken and tested. 4H: Price is holding at a supply level, I am looking to short to the nearest open demand Risk Management: 3:1

Read More »
AUD/NZD D1 Ascending triangle. SnD

Breakout

AUD/NZD | Long | D1 Timeframe: D1 Analysis Method: Ascending triangle. SnD Analysis: This pair has been consolidating for the past year in that zone with no proper trends taking place except inside that zone, while we are familiar with this pair trading so close

Read More »
AUD/NZD H1 Technical Analysis

AUDNZD Trend Continuation

AUD/NZD | Long | H1 Timeframe: H1 Analysis Method: Technical Analysis Analysis: AUD strength in focus towards 1.0868 off Daily support. Risk Management: Risk According to your plan.

Read More »
AUD/NZD D1 Price Action

AUDNZD Short

AUD/NZD | Short | D1 Timeframe: D1 Analysis Method: Price Action Analysis: The recent bullish trend seems to have weakened. Suitable for a probable short trade. Trade Plan: Short @ 1.07566 Risk Management: Stoploss @ 1.08300 Things To Watch For: If reversal really happens, hold

Read More »
AUD/NZD H4

AUDNZD Buy

AUD/NZD | Long | H4 Timeframe: H4 Analysis: The AUD has been bullish across most G8 currencies and is yet to reach a good sell zone while the NZD has been on a tear and is yet to reach a worthwhile buy zone. Due to

Read More »
AUD/NZD D1 Price Action

AUDNZD Long

AUD/NZD | Long | D1 Timeframe: D1 Analysis Method: Price Action Analysis: After a strong downtrend, price is showing signs of reversing as it broke a strong resistance area Trade Plan: Long at 1.06165 Risk Management: Stoploss set at 1.05374 using 0.25% risk Things To

Read More »
AUD/NZD H1 Level Supply  and Divergence

ANDNZD Bearish continuation

AUD/NZD | Short | H1 Timeframe: H1 Analysis Method: Level Supply and Divergence Analysis: The bearish trend seem really strong so far. The H4 have no divergence againts this bearish trend, so I drop in H1 and look for any key level like Supply to

Read More »

Your message is underway!

You will be hearing from us shortly